
Timing Dashboard
A timing dashboard written in Next.js
While working at GCD I was often tasked with improving internal processes and building tools to help us with it. A big point of friction at the time was recording time for tasks under SLA agreements with our clients. We used Monday for creating SLA tasks and harvest for timing them, but those 2 services did not integrate well with each other.
To solve this problem I wrote a dashboard app in Next.js 14, which combines data from both services and displays them in a tabular overview, similar to Monday’s layout.
Authentication
Information contained on the dashboard should not be exposed to the public internet. I chose Supabase Auth to add a Google sign-in prompt that only allowed internal Google Workspace accounts to access the website. This approach had some clear advantages such as automatic access for everyone with a company account and not having to maintain a database of users. Supabase also integrates nicely with Next.js and provides libraries for use in both client and server side components.
ID parsing
Since there is no integration between Monday and harvest, time entries and Monday items can’t be linked directly. We used free-form description fields in harvest to enter a Monday item ID to create a link between related entities. Before the dashboard existed the descriptions were parsed manually and entered into a spread sheet to add up time spent on individual SLA tasks. This was a very time consuming task that had to be carried out on a regular basis and was the main motivation for building this solution.
I wanted to support the same basic system of associating tasks with Monday items as it was simple and easy to use for our developers. To parse the Monday IDs from the description fields I used regular expressions to parse either entire Monday.com links or just plain Monday IDs.
// matches monday.com links, e.g. https://monday.com[...]/pulses/0123456789
const mondayLinkRegExp = /\/pulses\/([0-9]{10})(\s|\/|$)/;
// matches stand-alone IDs, e.g. 0123456789
const mondayIdRegExp = /(\s|^)([0-9]{10})(\s|$)/;
The first expression matches any ten digit number after the string /pulses/ followed by a whitespace character, / or
a line end. The second expression matches plain 10 digit numbers either surrounded by whitespace characters or line
start and end. Parsing the IDs in this way allowed us to retain the original functionality of the description field
while being able to associate a task in harvest with an item on a Monday board.
React Server Components
React server components make building performant web pages very easy as dynamic content can be streamed using Suspense
boundaries. I tried to use this concept as much as possible, while also utilising Next.js’s caching capabilities. For
example, I built an overview page that displays progress bars based on how much time of the monthly SLA budged had been
used up. This was only possible after all timing data had been fetched from harvest and processed together with data
from Monday, since each timing entry was costed at a different rate depending on the tasks priority level.
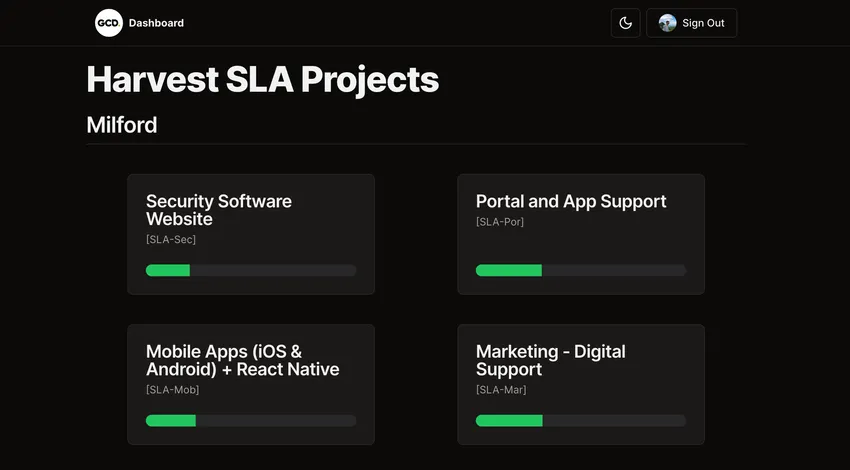
Dashboard overview page. The green progress bars can only be rendered if data has been fetched and processed.
Data Caching
With data caching and React.cache in Next.js it is relatively simple to fetch and calculate only once and then reuse
the same function call at a fraction of the original cost at some point later during the server side render. Instead of
prop drilling or using the context API to pass values client side we can simply call the same function again to share
data between components on the server side.
This made it easy to build components with a single purpose to separate concerns properly. The dashboards performance benefited greatly from utilising heavy caching strategies since it helped avoid repetition of costly API calls.
Cover image by rawpixel.com on Freepik